
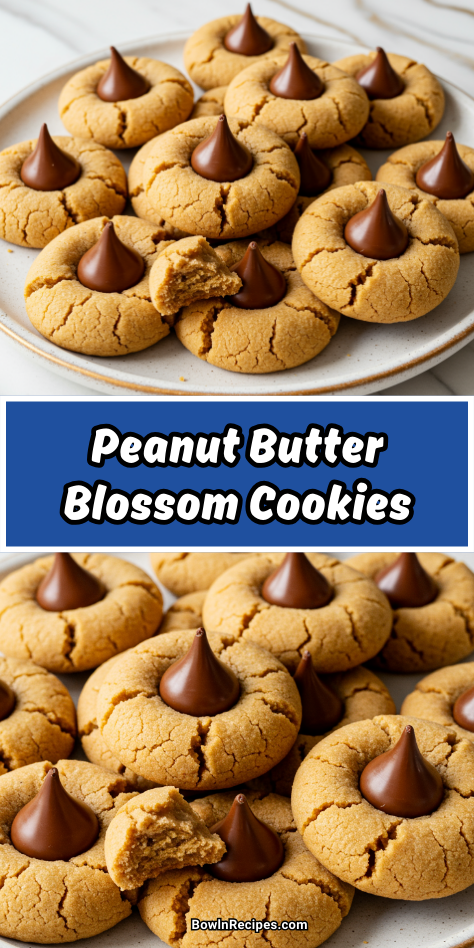
I baked a batch of these peanut butter blossom cookies yesterday and, oh my gosh, they brought me right back to childhood. You know that cozy feeling when the house smells like warm peanut butter and melted chocolate? Yup, it’s that vibe exactly.
These cookies are soft, chewy, and finished with a perfectly melty chocolate kiss in the center—basically dessert happiness in every bite. They’re the kind of cookie that’s welcome at every holiday party, cookie swap, or just because it’s Tuesday and you deserve something sweet.
And the best part? They’re super easy to make. No chilling required, and the dough comes together fast. My kids love pressing the chocolate kisses into the warm cookies—it’s our favorite part.
Why You’ll Love This Recipe
Peanut butter blossoms are everything you want in a cookie: soft, sweet, and totally nostalgic.
The dough bakes up with a tender, chewy center and a lightly crisp edge, and that signature chocolate kiss on top makes them as fun to eat as they are to look at.
They’re also a no-fuss, reliable recipe that doesn’t require any chilling. Whether you’re baking with kids, whipping up treats for a party, or just in the mood for something comforting, this recipe delivers every time. They also freeze well, so you can make a double batch and stash some for later.
What You’ll Need
- 1 ¾ cups all-purpose flour
- 1 teaspoon baking soda
- ½ teaspoon salt
- ½ cup (1 stick) unsalted butter, softened
- ½ cup granulated sugar (plus extra for rolling)
- ½ cup packed brown sugar
- ½ cup creamy peanut butter
- 1 large egg
- 1 teaspoon vanilla extract
- 24–30 milk chocolate kisses (unwrapped)
Pro Tips
- Use creamy peanut butter, not natural. Natural peanut butter can make the dough too oily or crumbly.
- Press the chocolate in while cookies are warm. The heat melts the kiss just enough to help it stick and get a little soft.
- Scoop evenly. Using a cookie scoop helps your cookies bake evenly and look uniform.
- Roll in sugar before baking. This gives each cookie that perfect crackled top.
- Let the cookies cool before stacking. The chocolate will stay soft for a bit—let them set so they don’t smudge.
Tools You’ll Need
- Mixing bowls
- Electric hand mixer or stand mixer
- Measuring cups and spoons
- Cookie scoop or tablespoon
- Baking sheet
- Parchment paper or silicone mat
- Wire cooling rack
Substitutions and Variations
- No peanut butter? Try almond butter or sunflower seed butter for a nut-free version.
- Make them gluten-free: Use a 1:1 gluten-free flour blend.
- Switch the chocolate: Use dark chocolate kisses or mini peanut butter cups instead.
- Add sprinkles: Roll the dough in festive sprinkles for a holiday twist.
- Mini blossoms: Make smaller cookies and use chocolate chips instead of kisses.

Make-Ahead Tips
- Make the dough in advance: You can prep the dough up to 2 days ahead and store in the fridge. Bring to room temp before baking.
- Freeze the dough balls: Roll them in sugar, freeze on a tray, then store in a freezer-safe bag. Bake from frozen (add 1–2 minutes to bake time).
- Freeze baked cookies: Let cool completely, then freeze in a single layer. Add kisses before freezing or after thawing—it works either way.
How to Make Peanut Butter Blossom Cookies
Step 1: Preheat and Prep
Preheat your oven to 350°F (175°C). Line a baking sheet with parchment paper or a silicone mat.
Step 2: Mix Dry Ingredients
In a medium bowl, whisk together flour, baking soda, and salt. Set aside.
Step 3: Cream Butter and Sugars
In a large bowl, beat softened butter, granulated sugar, and brown sugar until light and fluffy (about 2 minutes).
Step 4: Add Peanut Butter, Egg, and Vanilla
Mix in the peanut butter, then the egg and vanilla, until smooth and fully combined.
Step 5: Combine Wet and Dry
Gradually add the flour mixture to the wet ingredients and mix until a soft dough forms.
Step 6: Scoop and Roll
Scoop dough into 1-inch balls and roll each one in granulated sugar. Place 2 inches apart on the prepared baking sheet.
Step 7: Bake
Bake for 8–10 minutes, or until the edges are set and tops begin to crack.
Step 8: Add Chocolate Kisses
Immediately after removing from the oven, gently press a chocolate kiss into the center of each cookie. Let cool on the pan for 5 minutes before transferring to a rack.
Serving Suggestions
Serve these cookies with a glass of cold milk, hot chocolate, or a cozy cup of coffee.
They’re perfect for cookie platters, lunchbox treats, or sweet gifts during the holidays. You can even sandwich two together with frosting for a fun twist.
Leftovers and Storage
- Room temp: Store cookies in an airtight container for up to 5 days.
- Freezer (baked): Freeze cooled cookies in a single layer, then transfer to a bag. Thaw at room temp.
- Freezer (unbaked): Freeze dough balls (sugar rolled) and bake when ready—just add 1–2 minutes to baking time.
Nutrition & Benefits
While these cookies are definitely a treat, they offer a bit of protein from the peanut butter and are made with simple pantry ingredients.
Making your own cookies means no preservatives, and you get total control over portion size and ingredients. Enjoy them as part of a balanced life—one cookie (or two!) at a time.
Recipe FAQ
1. Can I use crunchy peanut butter?
Yes, but the texture will be a little more rustic. Still delicious though!
2. Can I double the recipe?
Absolutely—it scales up really well for parties or holiday baking.
3. Do the chocolate kisses melt completely?
Nope! They soften a bit from the warm cookies, but they hold their shape unless overheated.
4. Can I skip rolling them in sugar?
You can, but the sugar adds that classic sparkle and light crisp.
5. What if my kisses fall off?
Press them in gently but firmly while the cookies are warm. They’ll stick as they cool.
Soft, Sweet, and Always a Favorite
There’s just something about peanut butter blossom cookies that never goes out of style.
They’re easy, nostalgic, and the perfect balance of nutty and chocolatey. Whether you’re baking for a party, a holiday, or just a cozy afternoon treat, these cookies will always be a hit.