
I’m so excited to share this No-Bake Banana Split Cheesecake with you today. It’s the perfect solution when you’re craving something sweet but don’t want to turn on the oven. Rich, creamy cheesecake layers combined with classic banana split flavors – what’s not to love?
The combination of fresh fruits, chocolate, and that buttery graham cracker crust creates a dessert that looks impressive but is surprisingly simple. Want to know my secret for getting that perfectly smooth cheesecake texture without any baking?
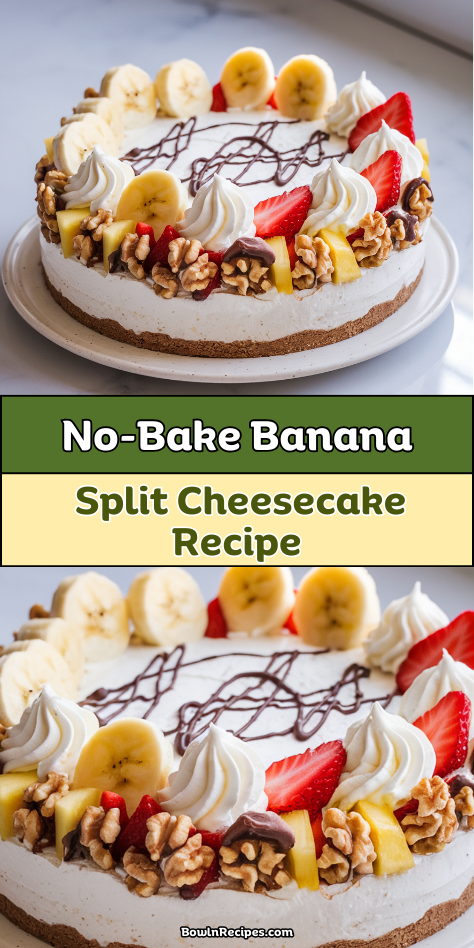
Why You’ll Love this No-Bake Banana Split Cheesecake
If you’re looking for the perfect dessert that combines all the classic flavors of a banana split without turning on your oven, this no-bake cheesecake is about to become your new favorite.
I can’t get enough of this creamy, fruity masterpiece. The tangy cream cheese pairs beautifully with sweet banana slices, juicy strawberries, and tropical pineapple. And that chocolate drizzle? Heaven.
What makes this recipe truly special is how simple it is. Just mix, layer, chill. No sweating over a hot oven during summer months. Plus, it’s totally customizable—add more chocolate, swap fruits, or go nuts with the, well, nuts.
What Ingredients are in No-Bake Banana Split Cheesecake?
This incredible no-bake cheesecake requires a perfect balance of creamy, crunchy, and fruity ingredients to capture that classic banana split flavor we all know and love.
- 1½ cups graham cracker crumbs
- ½ cup melted unsalted butter
- 2 cups softened cream cheese
- 1 cup powdered sugar
- 1 teaspoon vanilla extract
- 1 cup heavy whipping cream
- 2 ripe bananas, sliced
- 1 cup crushed pineapple, drained
- 1 cup sliced strawberries
- ½ cup chocolate syrup
- ½ cup chopped walnuts (optional)
- Whipped cream for topping
For the best results, make sure your cream cheese is properly softened and your bananas are ripe but still firm enough to slice without turning mushy—nobody wants brown banana surprises in their beautiful cheesecake!
How to Make this No-Bake Banana Split Cheesecake
Step 1: Prepare the Crust
Mix 1½ cups graham cracker crumbs with ½ cup melted unsalted butter until it resembles wet sand. Press this mixture firmly into the bottom of a springform pan, creating an even layer, then chill in the refrigerator for about 15 minutes to set. For the best results, consider using a high-quality stand mixer to ensure your crust ingredients are perfectly combined.
Step 2: Make the Cheesecake Filling
Beat 2 cups softened cream cheese, 1 cup powdered sugar, and 1 teaspoon vanilla extract until completely smooth and fluffy. This usually takes about 3-4 minutes with an electric mixer, and trust me, patience here prevents those dreaded lumps we all hate finding.
Step 3: Whip the Cream
In a separate bowl, whip 1 cup heavy whipping cream until stiff peaks form. The cream should stand up when you lift the beaters, but be careful not to over-whip or you’ll suddenly find yourself making butter instead of whipped cream.
Step 4: Combine the Filling
Gently fold the whipped cream into the cream cheese mixture using a spatula with a light hand. Folding rather than stirring preserves all that beautiful air you’ve whipped into the cream, keeping your cheesecake light and fluffy.
Step 5: Layer the First Filling and Fruit
Spread half of your cheesecake filling over the chilled crust. Then arrange sliced bananas (from 2 ripe bananas) and 1 cup drained crushed pineapple over this layer, distributing them evenly for that classic banana split flavor in every bite.
Step 6: Add the Final Layer and Chill
Cover the fruit layer with the remaining cheesecake filling, smoothing the top with an offset spatula. Refrigerate for at least 4 hours or overnight—this waiting part might be the hardest step of all, but it’s absolutely necessary for proper setting.
Step 7: Add the Toppings
Just before serving, decorate the top with 1 cup sliced strawberries, a drizzle of ½ cup chocolate syrup, and if you like that extra crunch, sprinkle with ½ cup chopped walnuts. Finish with dollops of whipped cream around the edges.
Step 8: Slice and Serve
Run a thin knife around the edge of the springform pan before removing the sides. Cut into slices with a clean, sharp knife dipped in hot water between cuts for those picture-perfect slices that’ll make everyone think you spent hours in the kitchen.
What to Serve with No-Bake Banana Split Cheesecake
This showstopper dessert deserves perfect companions! I love serving this cheesecake with a small scoop of vanilla bean ice cream on the side—because honestly, is there such a thing as too much creaminess? For drinks, try pairing with a rich coffee to balance the sweetness, or even a dessert wine like Moscato if you’re feeling fancy.
Fresh berries on the side add a bright, tart contrast that cuts through the richness beautifully. For the kids (or kids at heart), hot fudge sauce in little dipping bowls lets everyone add extra chocolate to their liking. This makes a spectacular finale to any dinner party, but works equally well as an indulgent afternoon treat with tea or coffee.
No-Bake Banana Split Cheesecake Substitutions and Variations
Make this cheesecake your own with these simple swaps and creative twists:
- Crust Options: Try vanilla wafers, chocolate graham crackers, or even crushed Oreos for a different base. For gluten-free, use gluten-free graham crackers or cookie alternatives.
- Dairy-Free Adjustments: Substitute dairy-free cream cheese and coconut cream (chilled overnight and whipped) for a non-dairy version.
- Fruit Variations: Swap in seasonal fruits like peaches in summer or caramelized apples in fall. Frozen berries work well when fresh aren’t available.
- Lower Sugar: Use a sugar substitute in place of powdered sugar and try sugar-free chocolate syrup.
- Fun Add-ins: Mix mini chocolate chips into the filling, add a layer of caramel sauce, or incorporate crushed pineapple directly into the cheesecake mixture.
- Topping Ideas: Sprinkle with colorful sprinkles, maraschino cherries, toasted coconut, or crushed candy bars for that authentic sundae experience.
Leftovers and Storage for this No-Bake Banana Split Cheesecake
This cheesecake keeps beautifully in the refrigerator for up to 3 days when stored in an airtight container. The graham cracker crust will gradually soften, but many folks (myself included) actually prefer the texture after it’s had a day to meld!
For longer storage, you can freeze individual slices:
- Wrap each piece tightly in plastic wrap, then aluminum foil
- Freeze for up to 1 month
- Thaw overnight in the refrigerator
Pro tip: Consider adding the fruit toppings just before serving rather than before storage. Those fresh strawberries and bananas can get a bit soggy after sitting for too long. If you notice the cheesecake drying out slightly, a fresh dollop of whipped cream works wonders to revive it!
Final Thoughts
This No-Bake Banana Split Cheesecake transforms everyone’s favorite ice cream parlor treat into a sophisticated dessert that requires zero baking. What makes it truly special is how it captures all those nostalgic banana split flavors—creamy cheesecake, sweet bananas, tangy pineapple, fresh strawberries and rich chocolate—in every single bite. It’s the perfect make-ahead dessert for summer gatherings when you’d rather not heat up the kitchen, or anytime you need an impressive finale that won’t keep you chained to the oven. The layers of flavor and texture create something far greater than the sum of its parts, proving that sometimes the most memorable desserts don’t require a single minute of baking time.
Frequently Asked Questions
Can I Use Frozen Fruits Instead of Fresh Ones?
Yes, you can use frozen strawberries, but thaw and drain them first to avoid excess moisture. I’d stick with fresh bananas though, as frozen ones become mushy when thawed and won’t hold their shape well.
Is This Recipe Suitable for People With Gluten Intolerance?
No, I wouldn’t recommend this for gluten-intolerant people as written. The graham cracker crust contains gluten. You could substitute gluten-free graham crackers or cookies for the crust to make it suitable.
How Far in Advance Can I Prepare This Cheesecake?
I’d recommend making this cheesecake up to 2 days in advance. It needs at least 4 hours to set properly, but don’t add the fresh toppings until right before serving for the best presentation.
Can I Freeze This Cheesecake for Later Consumption?
Yes, I’d recommend freezing it without the fresh fruit toppings. Wrap it tightly in plastic wrap and aluminum foil for up to 2 months. Thaw overnight in the refrigerator before adding fresh toppings.
What’s the Calorie Count per Serving of This Cheesecake?
I don’t have the exact calorie count for this recipe. It’s likely between 400-600 calories per slice depending on portion size and whether you include all toppings like walnuts and whipped cream.