
I’m about to share my ultimate game-day secret weapon—Buffalo Bacon Cheese Sticks. Can you imagine the perfect bite of spicy buffalo chicken wrapped around gooey mozzarella, all hugged by crispy bacon? It’s like the flavor trifecta your taste buds never knew they needed. These aren’t your average appetizers; they’re conversation-stoppers that’ll have everyone asking for the recipe. Want to be the MVP of your next gathering without spending hours in the kitchen? The magic is in the simple technique and bold flavors…

Why You’ll Love these Buffalo Bacon Cheese Sticks
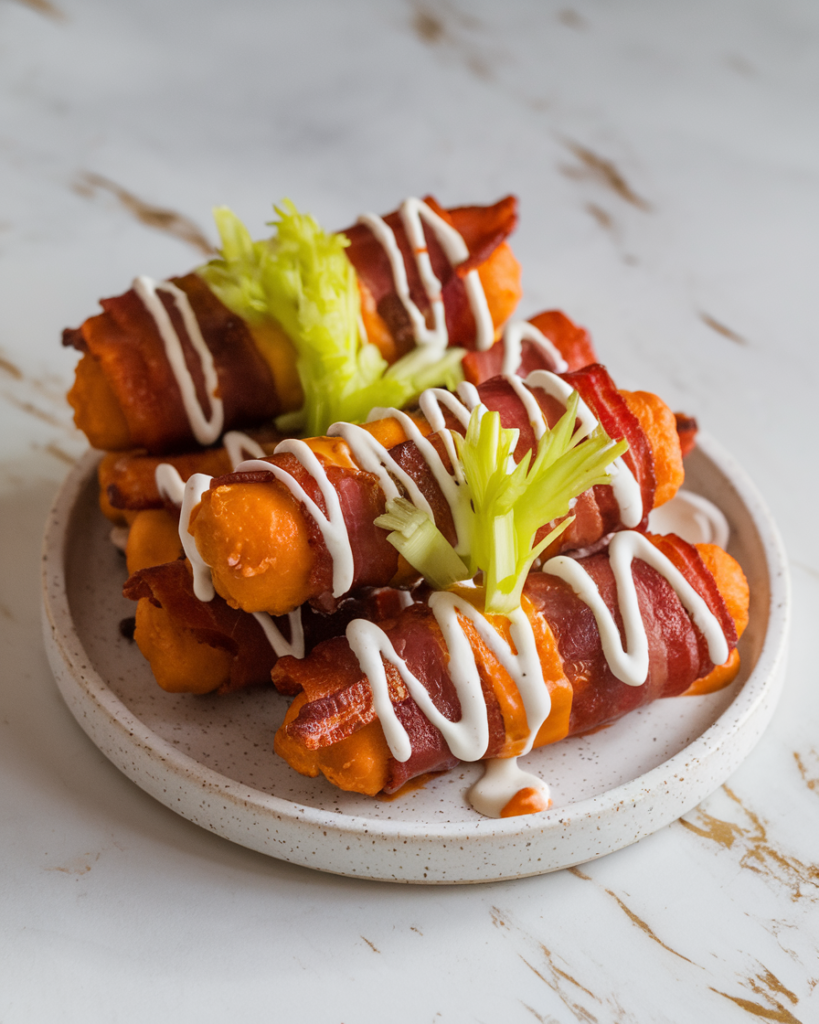
When you bite into one of these Buffalo Bacon Cheese Sticks, you’ll instantly understand why they’re worth every minute of prep time. The crispy, golden exterior gives way to gooey melted cheese, spicy buffalo chicken, and savory bacon—a flavor explosion that hits all the right notes.
I’m obsessed with the textural contrast between the crunchy breadcrumb coating and the melty cheese center. Can you think of a better game day snack? They’re portable, dippable, and guaranteed to disappear fast. Plus, they combine everyone’s favorite things: cheese, bacon, and buffalo sauce. What’s not to love?
What Ingredients are in Buffalo Bacon Cheese Sticks?
These Buffalo Bacon Cheese Sticks combine all my favorite comfort foods into one irresistible, crispy, cheesy package that’ll have everyone reaching for seconds.
- Cooked shredded chicken
- Buffalo sauce
- Mozzarella cheese sticks
- Bacon slices
- All-purpose flour
- Eggs (beaten)
- Seasoned breadcrumbs
- Garlic powder, onion powder, salt, and pepper (for breadcrumb seasoning)
- Vegetable oil (for frying)
For the best results, make sure your chicken is well-shredded and your bacon is high quality—the premium stuff really does make a difference when it’s wrapped around all that cheesy goodness.
How to Make these Buffalo Bacon Cheese Sticks
Step 1: Prepare the Buffalo Chicken Mixture
Mix your cooked shredded chicken with buffalo sauce until thoroughly coated. The sauce should generously coat each piece of chicken without making it soggy—we’re going for flavorful, not swimming in sauce. When preparing your ingredients, having a stand mixer bakeware set can help streamline your food preparation process.
Step 2: Wrap the Cheese Sticks
Take each mozzarella cheese stick and wrap it with a layer of the buffalo chicken mixture. Press the chicken firmly around the cheese to create a nice seal, which helps prevent cheese from escaping during frying.
Step 3: Add the Bacon Layer
Carefully wrap a bacon slice around each chicken-covered cheese stick, making sure it completely encircles the stick. Secure the bacon with a toothpick to keep everything in place during the breading process.
Step 4: Set Up Your Breading Station
Create a three-part breading station: one shallow dish with flour, another with beaten eggs, and a third with seasoned breadcrumbs mixed with garlic powder, onion powder, salt, and pepper. This assembly line approach makes the coating process so much more efficient.
Step 5: Bread the Sticks
Working quickly (because nobody wants melty cheese before frying), roll each wrapped stick in flour, then dip in beaten eggs, and finally coat thoroughly with the seasoned breadcrumbs. The key here is making sure every bit is covered for that perfect crunch.
Step 6: Heat the Oil
Heat vegetable oil in a deep pan or fryer to 350°F (175°C). The right temperature is essential—too cool and they’ll absorb too much oil, too hot and the outside will burn before the inside warms.
Step 7: Fry to Golden Perfection
Carefully lower your breaded sticks into the hot oil in small batches, frying for 3-4 minutes until they’re beautifully golden brown and crispy. Don’t crowd the pan, or the temperature will drop dramatically.
Step 8: Drain and Serve
Remove the fried sticks and let them drain on paper towels to absorb excess oil. Serve these beauties hot while the cheese is still wonderfully melty and stretchy. Can you think of anything more satisfying?
What to Serve with Buffalo Bacon Cheese Sticks
These indulgent, cheese-pulling appetizers deserve perfect companions! For dipping, blue cheese dressing is non-negotiable—it’s the classic buffalo wing partner for a reason. Ranch works beautifully too for the non-blue cheese fans among us.
Balance all that richness with a crisp celery and carrot stick platter, which provides that invigorating crunch we all need. For drinks, an ice-cold beer cuts through the spice wonderfully, or try a tart lemonade for non-alcoholic options.
These sticks make fantastic game day snacks or party appetizers, but honestly? Pair them with a simple green salad, and you’ve got yourself a rather impressive dinner that nobody will complain about. Who says appetizers can’t be the main event?
Buffalo Bacon Cheese Sticks Substitutions and Variations
Make these cheesy buffalo bites your own with these simple swaps:
- Protein Options: Rotisserie chicken saves time, or try pulled pork, shredded turkey, or even chopped shrimp for something different.
- Cheese Choices: String cheese works perfectly, but pepper jack adds extra heat, while cheddar brings sharpness. For a milder flavor, try Colby or Monterey Jack.
- Dietary Adjustments: Gluten-free? Use GF breadcrumbs and flour. Dairy concerns? Try dairy-free mozzarella sticks (they do exist!).
- Heat Level: Adjust buffalo sauce from mild to wild, or swap in BBQ sauce, teriyaki, or honey garlic for totally different flavor profiles.
- Coating Upgrades: Crushed corn flakes or potato chips create extra-crunchy exteriors. Panko breadcrumbs give a lighter crispiness.
- Serving Twists: Sprinkle with fresh chives, drizzle with honey, or dust with grated parmesan just before serving for that little something extra.
Leftovers and Storage for these Buffalo Bacon Cheese Sticks
While these crispy treats are absolutely best enjoyed fresh from the fryer, leftovers can still be salvaged with proper handling:
- Store cooled leftovers in an airtight container with paper towels between layers to absorb moisture. They’ll keep in the refrigerator for up to 3 days.
- To reheat, avoid the microwave (hello, soggy cheese sticks!). Instead, place them on a baking sheet in a 350°F oven for 7-10 minutes until heated through and crispy again.
- For longer storage, freeze fully cooled sticks in a single layer, then transfer to a freezer bag for up to 2 months. Reheat frozen sticks directly in the oven at 375°F for 15 minutes.
- The flavor actually develops nicely overnight, but the texture is never quite as magical as when freshly made.
Final Thoughts
These Deep Fried Buffalo Chicken Bacon Cheese Sticks represent comfort food at its most indulgent peak. The combination of spicy buffalo chicken, gooey melted cheese, and crispy bacon creates a flavor trifecta that’s nearly impossible to resist. They’re perfect for game day gatherings, weekend appetizers, or anytime you need to impress guests without spending hours in the kitchen. The beauty lies in their versatility—casual enough for a family movie night but special enough for celebrations. When life calls for something beyond ordinary snacking, these golden-fried marvels deliver satisfaction that ordinary cheese sticks can only dream about.
Frequently Asked Questions
Can These Be Baked Instead of Fried?
I’d recommend baking these at 400°F for 15-20 minutes, turning halfway through. You’ll still get crispy results, though not quite as golden as frying. Just watch carefully to prevent cheese leakage.
How Do You Prevent Cheese From Leaking During Frying?
I prevent cheese leakage by freezing the wrapped sticks for 30 minutes before breading, ensuring the coating completely seals the cheese, and maintaining proper oil temperature. Don’t overcrowd the fryer either!
Can I Prepare These Ahead and Freeze Before Cooking?
Yes, I’d definitely recommend freezing them before cooking! Flash-freeze them unwrapped on a baking sheet first, then transfer to a sealed container. They’ll fry perfectly straight from frozen—just add 1-2 minutes cooking time.
What’s the Best Way to Reheat Leftovers?
I’d reheat them in a 350°F oven for 5-7 minutes until crispy. Avoid the microwave as it’ll make them soggy. Air fryers work great too—just 2-3 minutes at 375°F for perfect crispiness.
Are These Keto-Friendly or Can They Be Made Gluten-Free?
No, these aren’t keto-friendly due to the breadcrumbs and flour. I can make them gluten-free by substituting almond flour for regular flour and using gluten-free breadcrumbs in the coating process.