
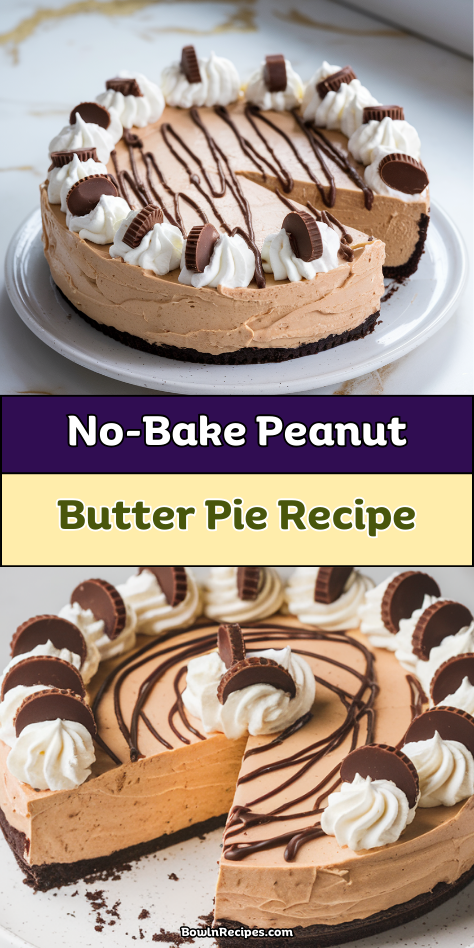
I’m so excited to share my absolute favorite dessert with you today: no-bake peanut butter pie! This creamy, dreamy confection combines two perfect partners—peanut butter and cream cheese—in a fluffy, mousse-like filling that sits atop a buttery graham cracker crust.
The best part? You won’t need to turn on your oven, making this the perfect treat for hot summer days or when you need a quick dessert that still impresses. Just wait until you see how simple it is to create this indulgence…
Why You’ll Love this No-Bake Peanut Butter Pie
If you’re anything like me, you’re always looking for desserts that deliver maximum flavor with minimum effort.
This no-bake peanut butter pie is the answer to your dessert dreams. Creamy, rich, and utterly decadent, it comes together in just minutes.
No hot oven required, which is perfect for summer gatherings, right? The combination of smooth cream cheese and peanut butter creates a silky texture that melts in your mouth.
And the best part? You can make it ahead of time. Just pull it from the fridge when guests arrive and watch their eyes light up.
What Ingredients are in No-Bake Peanut Butter Pie?
This dreamy no-bake peanut butter pie requires just a handful of simple ingredients that combine to create something truly magical.
- 1 pre-made graham cracker crust
- 8 oz cream cheese, softened (room temperature works best)
- 1 cup peanut butter (creamy is traditional, but crunchy works for texture lovers)
- 1 cup powdered sugar
- 1 tsp vanilla extract
- 8 oz whipped topping (like Cool Whip)
- Chocolate chips for garnish
While the recipe is perfect as written, feel free to customize with your favorite peanut butter brand—natural versions might change the texture slightly, and you could always substitute chocolate graham cracker crust for an extra chocolatey twist.
How to Make this No-Bake Peanut Butter Pie
Step 1: Beat the Cream Cheese
Take your 8 oz of softened cream cheese and beat it until it’s light and fluffy.
The key here is making certain your cream cheese is properly softened—cold cream cheese will leave you with lumps, and nobody wants a lumpy pie.
Step 2: Mix in the Peanut Butter and Dry Ingredients
Add 1 cup of peanut butter, 1 cup of powdered sugar, and 1 teaspoon of vanilla extract to your fluffy cream cheese.
Mix everything together until completely combined and smooth. This mixture should look thick and decadent, with a gorgeous peanut butter color.
Step 3: Fold in the Whipped Topping
Gently fold in your 8 oz of whipped topping using a spatula.
The operative word here is “gently”—we’re trying to maintain all that airy fluffiness, not deflate it with aggressive mixing. Think clouds, not concrete.
Step 4: Transfer to the Crust
Spread your peanut butter mixture into the pre-made graham cracker crust, creating an even, smooth top.
A silicone spatula works wonders here to get every last bit of that peanut buttery goodness out of the bowl.
Step 5: Chill the Pie
Place your assembled pie in the refrigerator for at least 4 hours, but overnight is even better.
Patience is a virtue that pays off tremendously with this dessert—proper setting time guarantees perfect slices.
Step 6: Garnish Before Serving
Just before serving, sprinkle chocolate chips over the top for a delicious garnish.
For an extra touch of decadence, consider drizzling with chocolate sauce, which pairs beautifully with the creamy peanut butter filling.
For the ultimate presentation, serve your pie on a premium enameled casserole dish that provides an elegant contrast to the dessert.
Step 7: Storage Options
If you’re not serving the entire pie immediately, it can be frozen for up to two weeks.
Just wrap it well in plastic wrap and thaw in the refrigerator before serving. Perfect for making ahead when you’re expecting guests.
What to Serve with No-Bake Peanut Butter Pie
This creamy, indulgent pie deserves some thoughtful accompaniments to round out your dessert experience. A scoop of vanilla bean ice cream creates a classic contrast to the rich peanut butter filling. For a beverage pairing, try serving with a cold glass of milk or a hot cup of coffee with a splash of cream—both cut through the sweetness beautifully.
Fresh berries, particularly strawberries or raspberries, add a welcome burst of tartness and color to your plate. If you’re feeling extra fancy, a small dollop of lightly sweetened whipped cream alongside each slice makes everything feel special.
And honestly, who could say no to a drizzle of warm chocolate sauce right before serving? This dessert works perfectly after dinner or as an afternoon treat when you need something truly satisfying.
No-Bake Peanut Butter Pie Substitutions and Variations
• Lightened Up: Use reduced-fat cream cheese and natural peanut butter with half the powdered sugar for a less sweet version that still satisfies.
Leftovers and Storage for this No-Bake Peanut Butter Pie
This creamy pie stores beautifully in the refrigerator for up to 5 days, tightly covered to prevent it from absorbing other food odors.
The flavors actually deepen overnight, making day-two slices particularly delicious—if you can resist finishing it on day one!
For longer storage, the freezer is your friend. Simply wrap individual slices or the whole pie tightly in plastic wrap, then foil, and freeze for up to 2 weeks.
When you’re ready to enjoy, thaw in the refrigerator for 3-4 hours.
A few quick tips:
- Use a sharp knife dipped in hot water for clean slices
- Return leftovers to the fridge immediately after serving
- If the pie develops condensation after freezing, gently blot with paper towel
- Add chocolate chip garnish just before serving for the best texture
Final Thoughts
This no-bake peanut butter pie stands in that perfect culinary sweet spot—impressively delicious yet remarkably simple.
The combination of creamy peanut butter and fluffy whipped topping creates a texture that’s simultaneously rich and light, a paradox that keeps everyone coming back for seconds.
The generous inclusion of chopped Reese’s cups throughout the creamy filling takes this dessert to an irresistible level of indulgence.
It’s my go-to dessert for summer gatherings when turning on the oven feels like a crime against humanity, or during busy holiday seasons when oven space is precious real estate.
The fact that it can be made days ahead only adds to its appeal.
In a world of complicated desserts, sometimes the simplest combination of flavors brings the most comfort to our tables.