
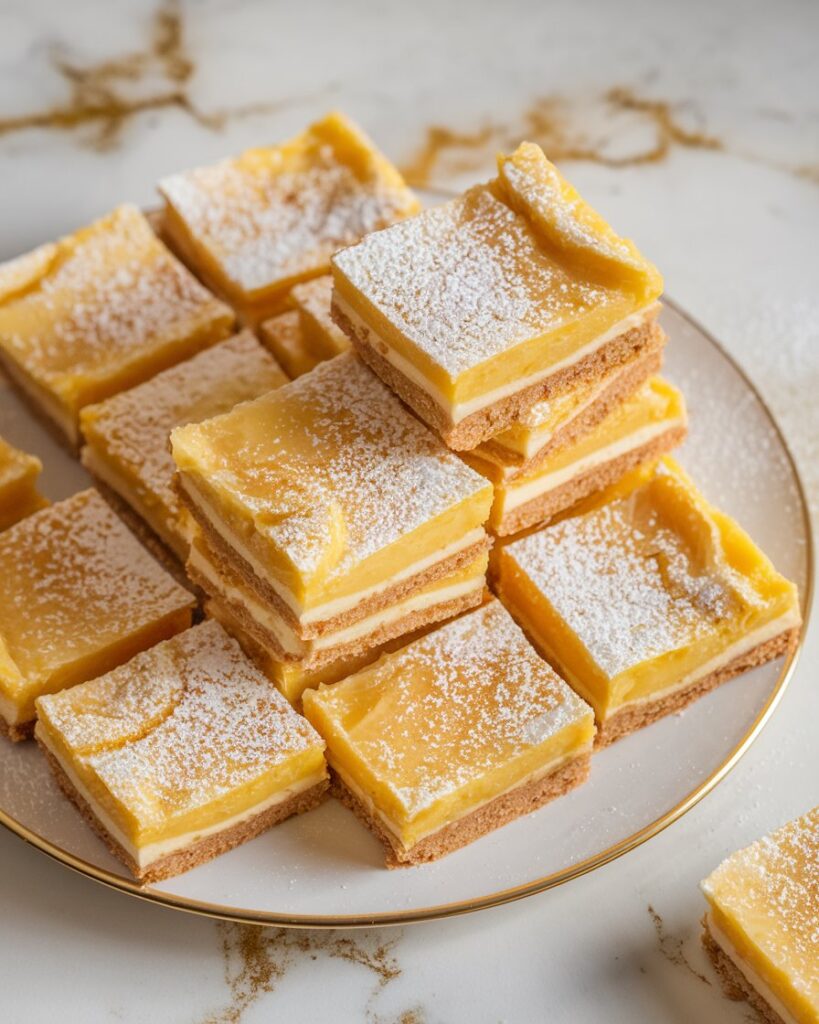
I have to tell you about these 2-ingredient lemon bars I made the other day—because wow, they’re kind of magic. I was low on time (and groceries), but I still wanted something bright and sweet to lift the mood.
These came together in just minutes, and the result? Gooey, lemony squares that tasted like sunshine in dessert form. They’re soft and chewy with a golden crust and tart lemon flavor that’s not too sweet.
The fact that they use only two simple ingredients—and still deliver that kind of flavor—is borderline dangerous. I already know I’ll be making these on repeat all summer long.

Why You’ll Love This Recipe
You’re going to love these lemon bars because they take barely any effort, taste amazing, and only require two ingredients. Yep—two! There’s no complicated crust, no eggs to separate, and no mixer needed.
All you need is a can of lemon pie filling and a box of angel food cake mix, and in about 30 minutes, you’ve got a dessert that’s tangy, fluffy, and totally craveable.
They’re perfect for last-minute guests, bake sales, potlucks, or just when you want something lemony and sweet without turning your kitchen upside down. And honestly, it’s fun watching such a simple combo bake into something so satisfying.
What You’ll Need
- 1 box (about 15.75 oz) angel food cake mix
- 1 can (21 oz) lemon pie filling
Optional Toppings:
- Powdered sugar for dusting
- Whipped cream or Cool Whip
- Fresh lemon zest
- Fresh berries (for serving)
Pro Tips
- Use the right cake mix. Make sure it’s just the standard one-step angel food cake mix—no extra packets inside.
- Don’t overmix. Stir the lemon pie filling and cake mix just until combined to keep the fluffiness.
- Let them cool. They’ll firm up as they cool and get easier to cut.
- Line your pan. Use parchment paper or spray your pan well to prevent sticking.
- Cut with a plastic knife. Weird trick, but it helps you get cleaner cuts without tearing the bars.
Tools You’ll Need
- Mixing bowl
- Spatula or wooden spoon
- 9×13-inch baking pan
- Non-stick spray or parchment paper
- Knife for cutting
- Fine mesh sieve for dusting powdered sugar (optional)
Substitutions and Variations
- Make it fruity: Use cherry, blueberry, or strawberry pie filling instead of lemon for a twist.
- Add texture: Stir in shredded coconut or white chocolate chips before baking.
- Gluten-free version: Use a gluten-free angel food cake mix if needed.
- Lemon-lime: Add some fresh lime zest or swap lemon filling for key lime pie filling.
- Make it mini: Pour batter into mini muffin tins for bite-size lemon bar “puffs.”
Make-Ahead Tips
- Bake ahead: These lemon bars are actually better after they’ve cooled and rested for a few hours, so feel free to bake them the night before.
- Storage: Store in the fridge in an airtight container for up to 4 days.
- Freezer-friendly: Freeze cut bars between layers of parchment paper for up to 2 months. Thaw in the fridge overnight before serving.
- Transport ready: Once cooled, you can leave them in the baking dish with a lid for easy travel to picnics or potlucks.
How to Make 2-Ingredient Lemon Bars
Step 1: Preheat and Prep
Preheat your oven to 350°F (175°C). Lightly grease a 9×13-inch baking pan or line it with parchment paper.
Step 2: Mix the Ingredients
In a large mixing bowl, combine the angel food cake mix and lemon pie filling. Stir gently until well blended. The batter will be fluffy and airy—don’t overmix.
Step 3: Pour into Pan
Spread the batter evenly into the prepared baking dish. It may look airy and bubbly—totally normal.
Step 4: Bake
Bake for 25–30 minutes or until the top is golden brown and a toothpick inserted in the center comes out clean.
Step 5: Cool and Slice
Let the bars cool completely in the pan. Then slice into squares and dust with powdered sugar, if desired.
Serving Suggestions
- Serve chilled or at room temperature with a dusting of powdered sugar.
- Add a dollop of whipped cream or Cool Whip for extra indulgence.
- Pair with fresh raspberries, strawberries, or blueberries.
- Serve on a dessert tray with other easy bar recipes for a crowd-pleasing spread.
- Enjoy with iced tea or coffee for a sunny afternoon treat.
Leftovers and Storage
- Fridge: Store in an airtight container in the refrigerator for up to 4 days.
- Freezer: Freeze cut bars between layers of parchment paper for up to 2 months. Thaw in the fridge before serving.
- On the counter: If your kitchen is cool, they’ll keep for 1–2 days at room temp.
- Revive with a quick chill: If they get too soft, pop them in the fridge for 30 minutes before serving.
Nutrition & Benefits
While these lemon bars are definitely a sweet treat, they’re lighter than traditional lemon bars thanks to the angel food cake base.
Angel food cake is naturally low in fat, and the lemon pie filling adds bright citrus flavor without needing extra sugar or butter. They’re a great “feel-good” dessert when you want something sweet but simple.
Recipe FAQ
1. Can I use homemade lemon curd instead of pie filling?
You can, but you may need to adjust the consistency. Store-bought lemon pie filling has stabilizers that help the bars set properly.
2. Do these need to be refrigerated?
Yes, if you’re not eating them the same day, store them in the fridge to keep them fresh.
3. Can I add anything else to the batter?
Totally! Try white chocolate chips, coconut, or even a swirl of raspberry jam.
4. Why are my bars sticky on top?
That’s normal for this recipe. The top sets into a light crust while staying gooey underneath.
5. Can I make these gluten-free?
Yes—just use a gluten-free angel food cake mix (some grocery stores carry them, or you can find one online).
Bright, Sweet, and Almost Too Easy
These 2-ingredient lemon bars are the ultimate last-minute dessert. They’re light, flavorful, and feel like a sunshine-filled treat—without any fuss.
Whether you’re baking with kids, prepping for a party, or just want a quick sweet fix, this recipe will never let you down. Keep a box of cake mix and lemon filling in the pantry—you’ll be glad you did.